Here is part 1:
Start off by generously greasing and flouring your cake pans.
This is a 10" and 18" pan. The 18" pan is too big to fit in the oven, so you have to bake them in 2 half circle pieces.
Closeup of the pan to show what I mean by "generously" grease and flour.
Let cakes cool on rack. At this point you might be thinking, okay, I do this at home all the time. Don't forget this is all X4.
Once they cake is cooled, put it back in the pan so you can cut the top off flat. You could do this right out of the oven, but in my experience the cakes are too fragile if you cut them hot. I use a large bread knife that reaches across the pan.
Cut flush with the top of the pan.
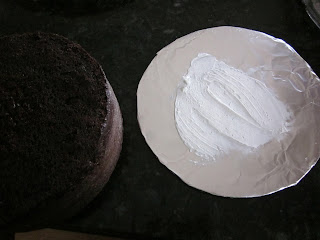
Attach your cake to your cake board with some frosting. It acts like glue and holds the cake in place. *Also note that you put the cake on the cake board UPSIDE DOWN. This gives you a nice sharp angle on the top edge. After this picture I placed the board on the cake and then flipped them both over. Then I wrapped all layers in plastic wrap and tin foil and froze them overnight. This helps lessen the crumbs and makes the cakes easier to work with.
If you are filling your cake, cut it in half after it is on the cake board and after it's been frozen.
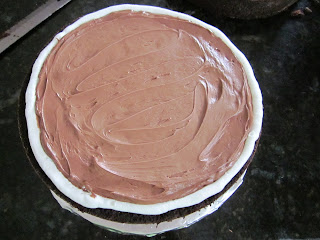
When you are filling or "torting" a cake, you need to make a "dam" of icing around the edge. This will keep the filling from gushing out the sides once the top is attached. Especially with a wedding cake, you don't want anything that is not white showing through the icing. This cake was a chocolate w/chocolate mousse.
And speaking of filling a cake....I was doing a raspberry jam filling for this cake. No one wants to bite into a cake and have raspberry seeds so you need to remove them. I poured the bottle of raspberry jam into a wire sieve and stirred like mad. :)
These are the seeds I got from 1/2 of the bottle.
And here again I've made a "dam" of frosting around the edge of the cake and filled the middle with the raspberry jam. *Another tip you can see in this pic is putting a little frosting on the inside of the cake before you put the filling in, especially jam. You want a white cake with red filling, not a pink cake. ;)
Next comes the "crumb coat". Basically this is a very thin layer of frosting that literally "coats the crumbs" onto the cake. This will keep any crumbs out of your final frosting. The chocolate cakes come out looking like they have chocolate chip frosting at this stage. In the next stage I will put a final layer of frosting on the cake that will be all white.
This picture is a little deceiving. The two smaller cakes are on pedestals that you can't see. *One of the biggest tricks to making a wedding cake is being sure all layers are the same height. Especially if they are stacked on each other. If they are separated it's not as noticeable, but one on top of the other is very noticeable.
My time for a 4 tier cake so far:
- Buying supplies - 3 hours
- Baking the 4 cakes and prep - 6 hours.
- Cutting, torting, making frosting and crumb coating 4 cakes with prep - 6 hours
To be continued...........................


No comments:
Post a Comment
I love comments! Thanks for taking the time to leave a comment, I read every single one.