While we’re together today, I want to share some of my favorite projects with you. Before we get to that, though, let me tell you a little bit more about me. First, I am indeed one tall chick, and I live in North Carolina with the hubby (Mr. Man) and our darling daughter (The Babe). I worked in corporate marketing before giving up the gig last year to stay home. I was nervous about becoming a stay-at-home-mom, but between all these projects and blogging, time is flying by and I’m having a blast! With that, let’s take a stroll down memory lane with some of my favorite projects.
 |
| Visit my blog at www.thetallchickblog.com |
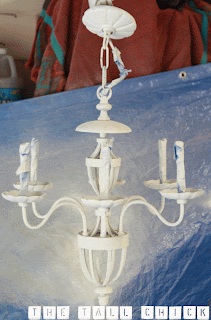
One of my favorite projects is the upcycled chandelier makeover. The project began with a $30 brass chandelier I found at my local Habitat for Humanity ReStore, now that’s thrifty! I love the clean lines, and I thought it would make a nice statement in our stairwell. From the beginning, though, I envisioned it with a “different” color. Here it is before.
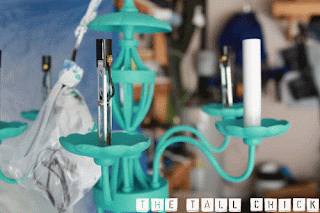
Then, I painted it with a turquoise shade of regular enamel paint in Valspar's Twilight Meadow.
Once I had it all painted, it was ready to hang with one exception. I wanted to come up with a creative way to hide the unattractive chain and electrical wires. So, I made a chain cover out of fabric and used velcro to secure it. Easy peasy and thanks to the magic of blogvision, here's the before and after!
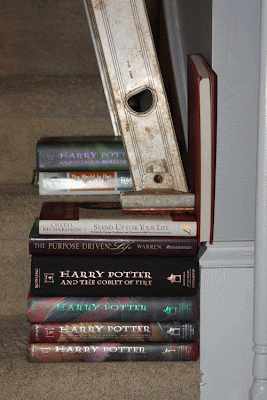
Honestly, this project was super easy from the standpoint of painting the chandelier and getting it ready to hang. BUT, I have to keep it real. We decided to hang the chandelier in the middle of our stairwell and it was challenging to reach, even for a chick as tall as me! I would love to have you read more about the step-by-step details on painting the chandelier here, and my funny “I almost died” recap on hanging it here. Seriously, I risked life and limb to get this chandelier hung and this picture gives you a hint on the risk involved.
 |
| The things we'll do for projects, huh? :) |
While you’re visiting my blog, please also check out these other favorite projects!
 |
| Click Here To Read All About It |
Thanks so much, Michelle, for inviting me here today! And thanks to all of you for graciously allowing me to share some of my decorating and DIY projects with you while she’s busy vacationing! I hope you’ll come visit me, and I would love to have you as a regular reader and as a Facebook fan!


No comments:
Post a Comment
I love comments! Thanks for taking the time to leave a comment, I read every single one.