Items needed:
Base Coat
Color Coat
Top Coat
Black craft paint
Toothpick
 Step 1: Paint your nails whichever color you wish. Make sure your color coat is completely dry.
Step 2: Put a small dab of craft paint on a plate or other disposable item.
Step 3: Dip your toothpick into the black craft paint and spin the toothpick to even out the excess paint. Use the tip of the toothpick. (I found if you try to "lay" the toothpick along your nail you get fat lines)
Step 4: After the craft paint has dried, put several layers of clear coat over the design to protect it.
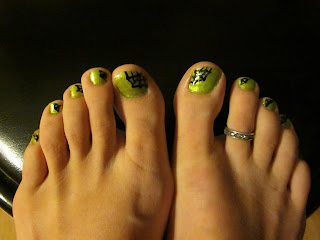
Here's my final result:

And how cute is this that Brooke at All Things Thrifty did on her little girl's toes?
 Happy Halloween! :)


Love both the green and orange toes!
ReplyDelete